AWS - Part 3 - Identity Access Management
15 Aug 2019AWS has IAM service to let account holders manage access to resources by users or entities. IAM allows account owners to create and delegate creation of users, groups, roles and assign permissions using policies.
Using IAM, one can create users and give login access to shared AWS console. Multiple users can be organized in groups and groups can have permissions assigned to them by using policies. Permissions allow us to manage who can access what. In addition, IAM can be configured to enable Identity Federation, that is, users can login using corporate Active Directory, Facebook, Google, LinkedIn or any Open ID supported accounts. We can also enable Multi factor authentication, setup password rotation policies and manage access keys/passwords of users.
IAM also allows temporary access for services/users/devices when required. IAM is also essential if you want one of your services to access another service within AWS. So for example, if you want your EC2 instance to access S3, you will need to use IAM to create a role with permission to access S3 and attach that to EC2 instance.
We explore Users/Groups/Roles and Policies in detail below:
User
A user is unique identity within an account. It can send requests to services such as EC2 and S3, use AWS console on behalf of account owner, and also access resources under different accounts on which account owner has access. All resources created and used by a user are paid for by account owner.
A user can have password, acccess keys, X.509 certificate, SSH Key and MFA for authentication. An employer can decide what makes more sense for user to have and may provide any or all of these credentials to them. Account owner can manage user creation/management himself or he can delegate user management to another user.
Users are global entites. You can not restrict users to global or define users which are region specific. At time of writing, you can not set quotas for individual users so if your entire account has limit of 20 EC2 instances, then a single user can use them up.
SSH Keys of users can only be used to access Code Commit repositories. A user’s SSH key can not be used to login into EC2 instances. EC2 instance SSH keys need to be shared among users.
Groups
Groups are created to manage users with similar access rights. You can add or remove user from group. A user can belong to multiple groups but a group can not belong to another group. Groups can be granted permissions by using Access Control Policies.
Roles
According to AWS IAM Faqs, Role is an IAM entity with a set of permissions assigned to it. Roles are not associated with individual groups or users, they are assumed by trusted entities such as users, applications or services such as EC2. Roles are confused with groups but they’re different. Roles are assumed by entities such as Users, EC2, applications and services to perform certain actions. Roles are really important for EC2 instances. They allow services running in EC2 to access other services in AWS such as RDS and S3. Roles also allow rotation of credentials on EC2 instances. For more details on roles please read roles section in IAM FAQs page.
Permissions
Permissions are managed by Access control policies. ACLs may be attached to user, group or role. By default groups and roles have no permissions. Users with privilleges can grant desired permissions to them.
Managed policies are resources which can be created and managed independent of groups and roles. AWS has set of managed policies. Customers can also create their own managed policies by either using visual editor or using JSON via cli or API calls.
You can attach single policy to multiple groups and roles. When you change that policy it takes immediate effect on all users and roles it’s associated with.
So what’s difference between assigning permissions to groups and managed policies? Quoting from AWS FAQs:
“Use IAM groups to collect IAM users and define common permissions for those users. Use managed policies to share permissions across IAM users, groups, and roles. For example, if you want a group of users to be able to launch an Amazon EC2 instance, and you also want the role on that instance to have the same permissions as the users in the group, you can create a managed policy and assign it to the group of users and the role on the Amazon EC2 instance.”
Policy Simulator
You may use Policy Simulator to test and troubleshoot your IAM settings.
Temporary Credentials
Temporary credentials consist of secret key, access key and a token which are only valid for a limited amount of time. They allow us to provide credentials which expire after a certain time. This allows improved security specially when calling APIs via mobile devices which can be lost. IAM users can request temporary security credentials for their own use by calling the AWS STS GetSessionToken API. The default expiration for these temporary credentials is 12 hours; the minimum is 15 minutes, and the maximum is 36 hours.
Faq page
FAQ page for IAM is very detailed and contains answers to many questions so it’s good to overview it. It also contains links to other useful resources so do read it if you have time. Link: https://aws.amazon.com/iam/faqs/
How to do it
I covered a lot of theory above. Now let’s do it practically.
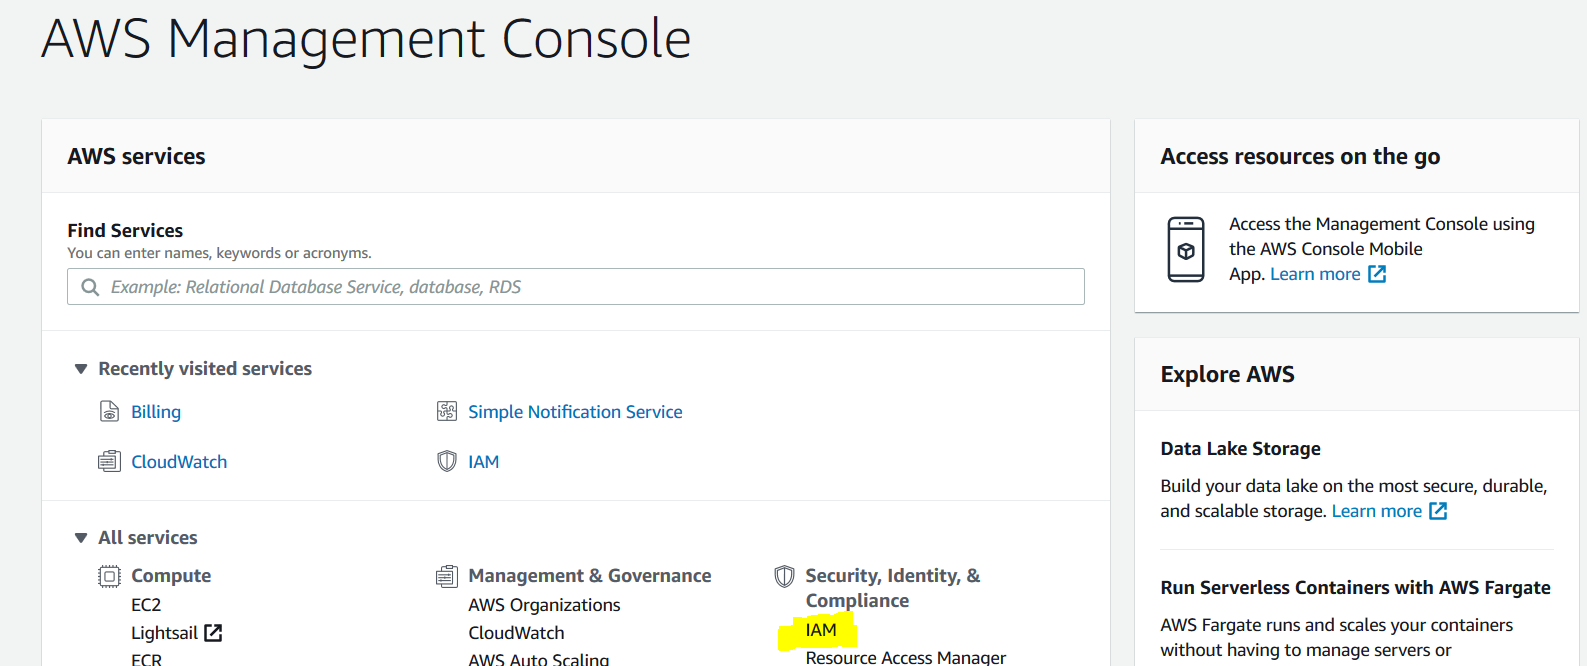
Login into AWS console and you will see a list of services. Select IAM under Security, Identity and Compliance.
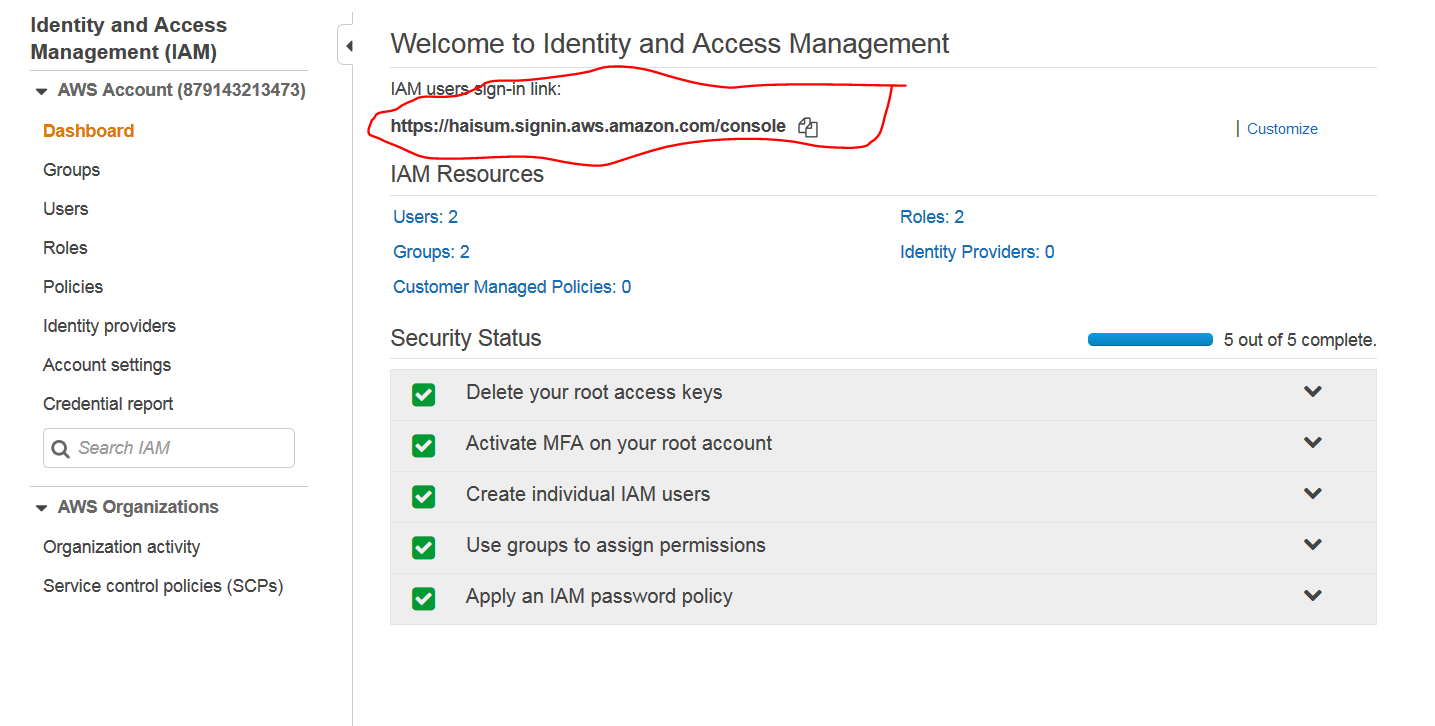
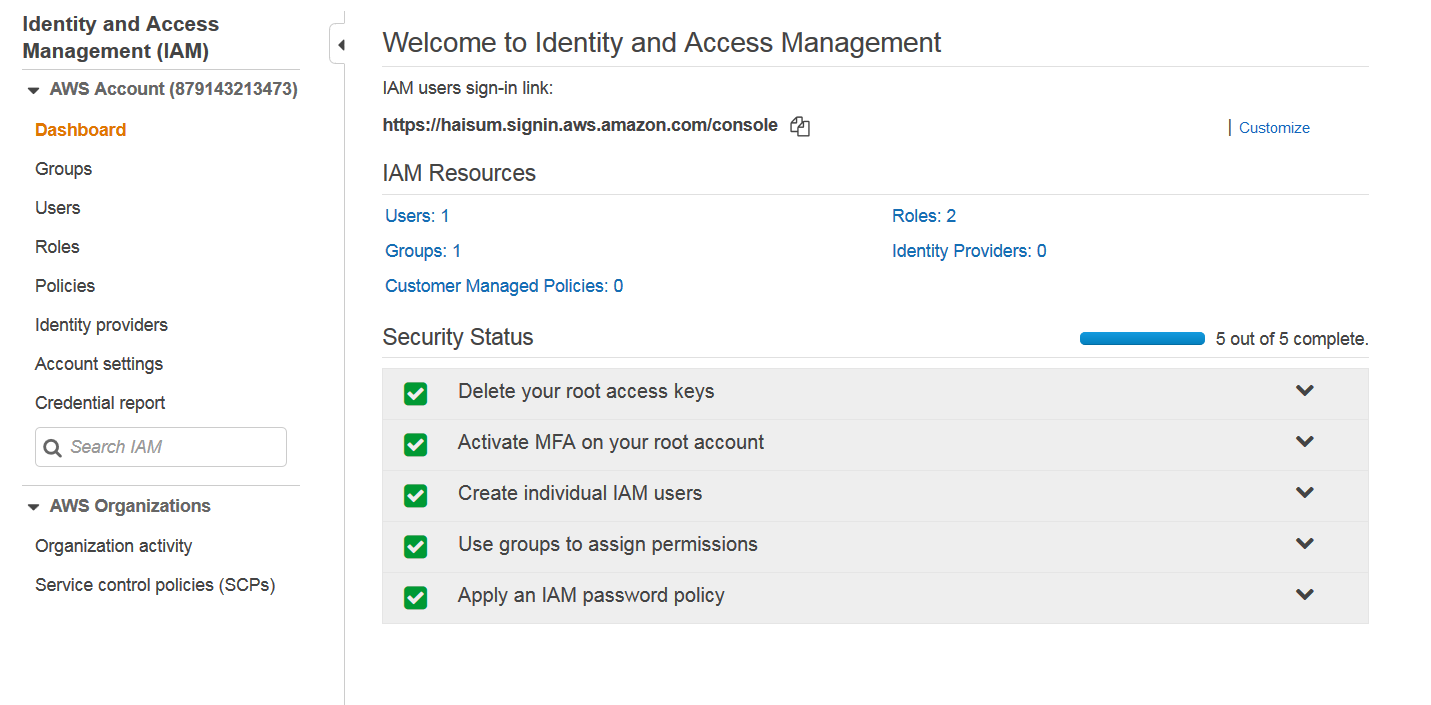
You will be taken to IAM dashboard. Initially 4 out of 5 in Security Status will be red marks. You can go into each and do suggested to make them green.
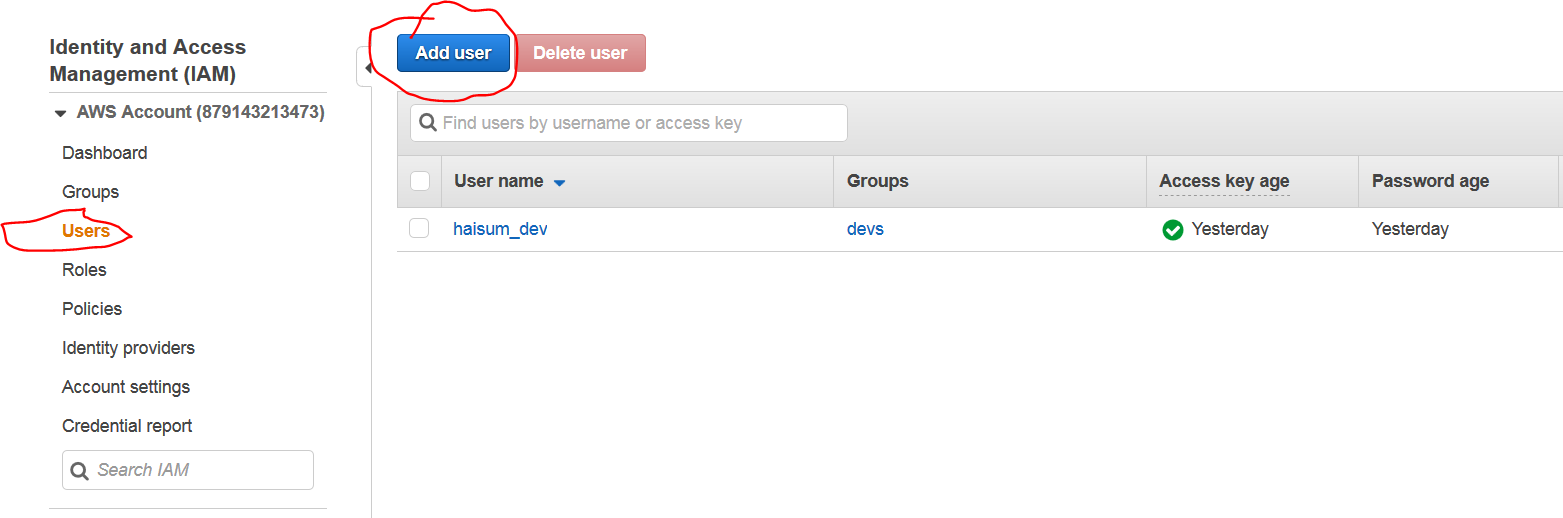
We will explore how to create users. In users tab, select add user.
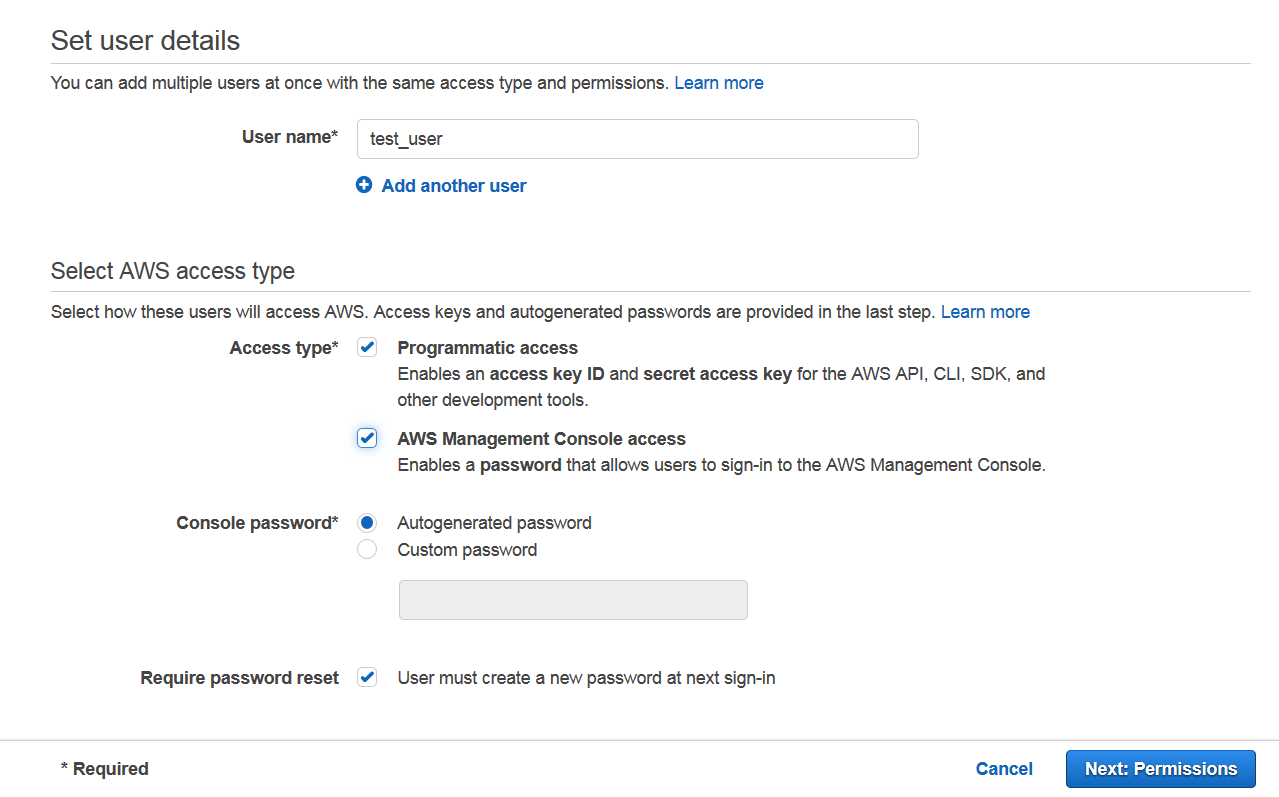
Select a name for user. You may want to give either or both of console and programmatic access to a user depending on use case. You can also auto generate or manually create a password for user. AWS can also force user to do a password reset on next login.
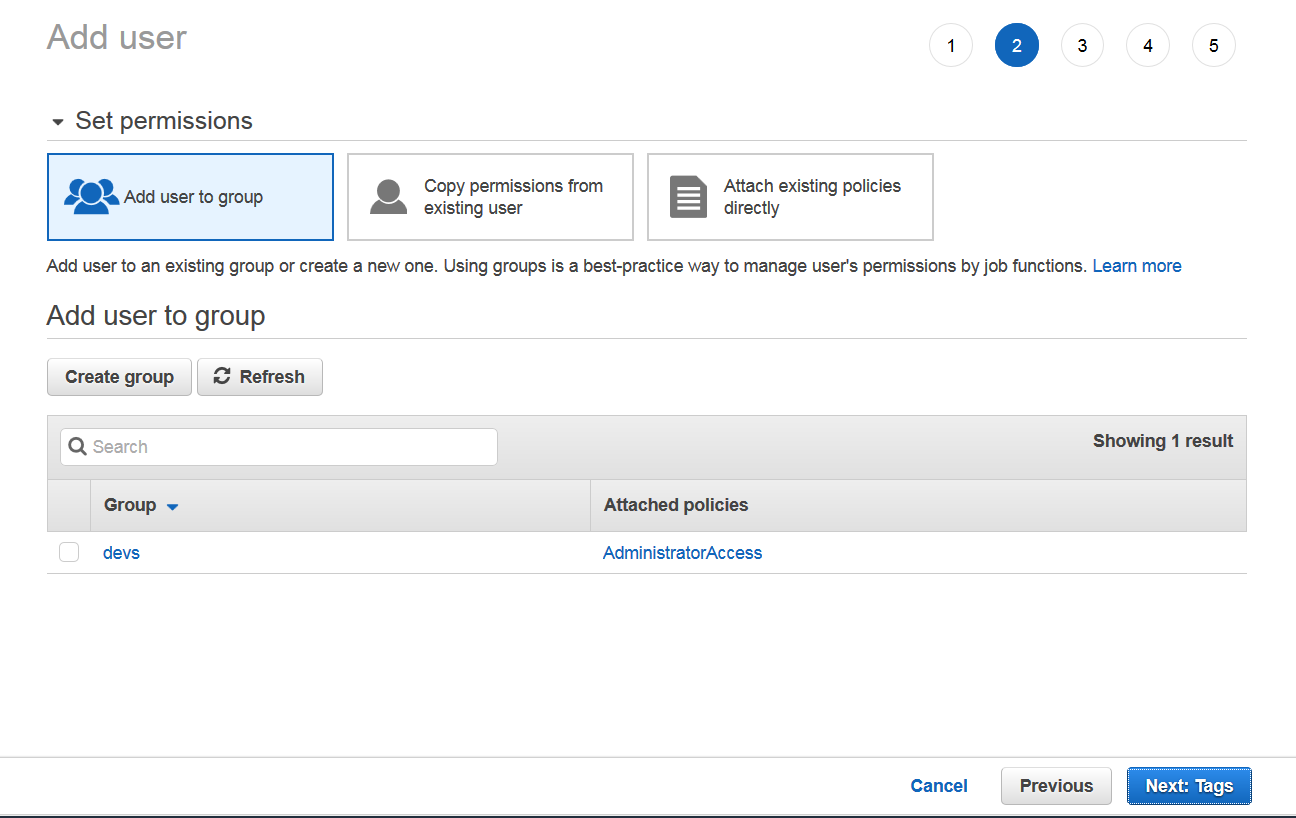
Next step is to add user to a group. You may create a new group here.
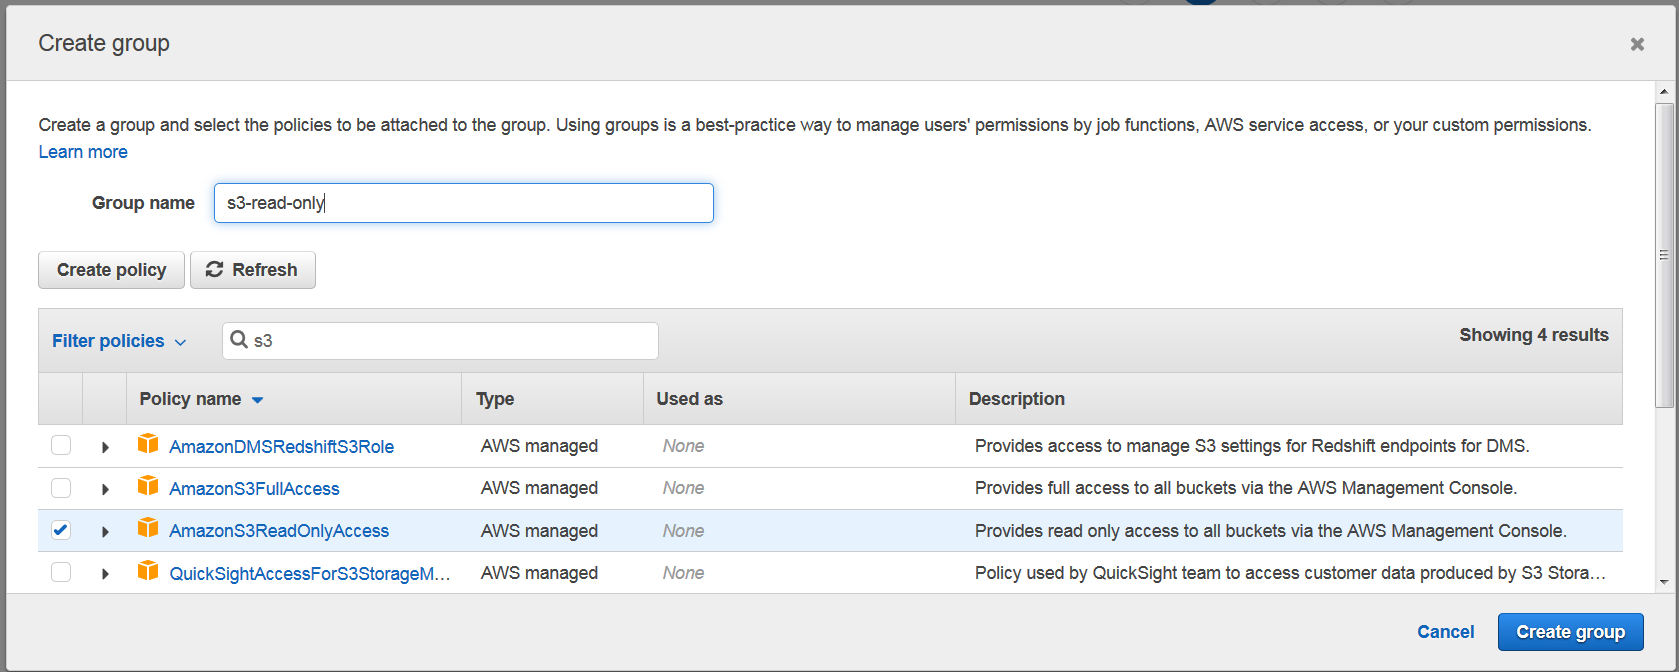
Click on create group button and a popup window will appear. Here you may want to select granular permissions for this group. For example, if you want user to have read only permissions to S3, you may create a group like this:
If you want to create group for administrators with all access, you may create a group like this:

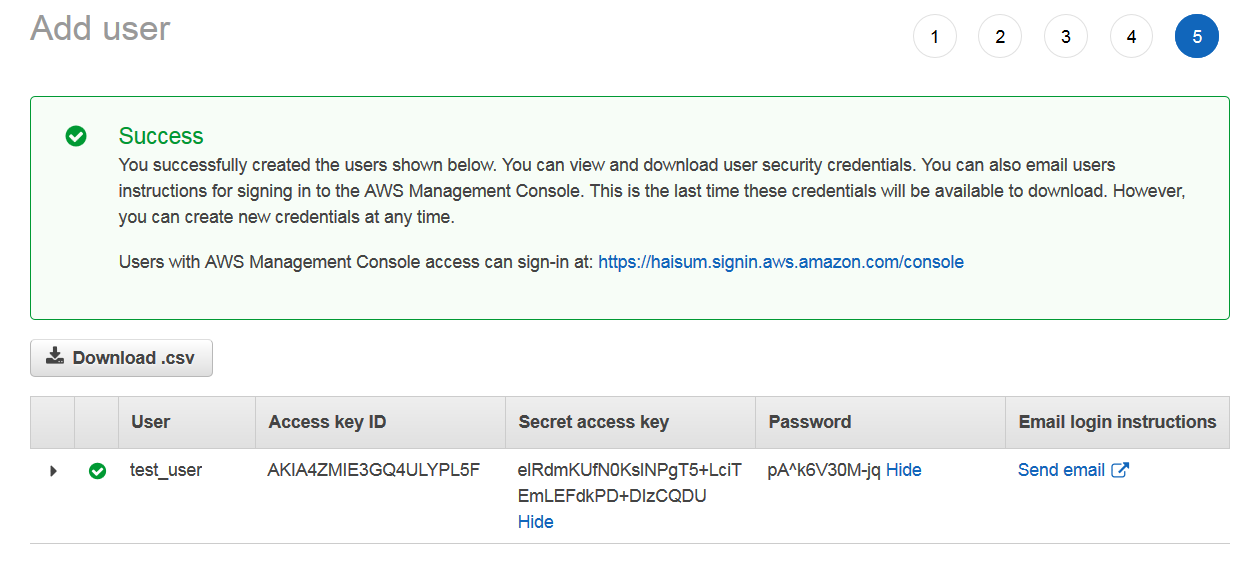
Next, you can add tags if you want to filter users according to some labels. Once user is created, you will get a success window with Access key, secret key and password. This information will only be presented to you once and can’t be retrieved again. So it’s good idea to Download.csv and share with user or send email.
Once done, your user will start appearing in list of users.

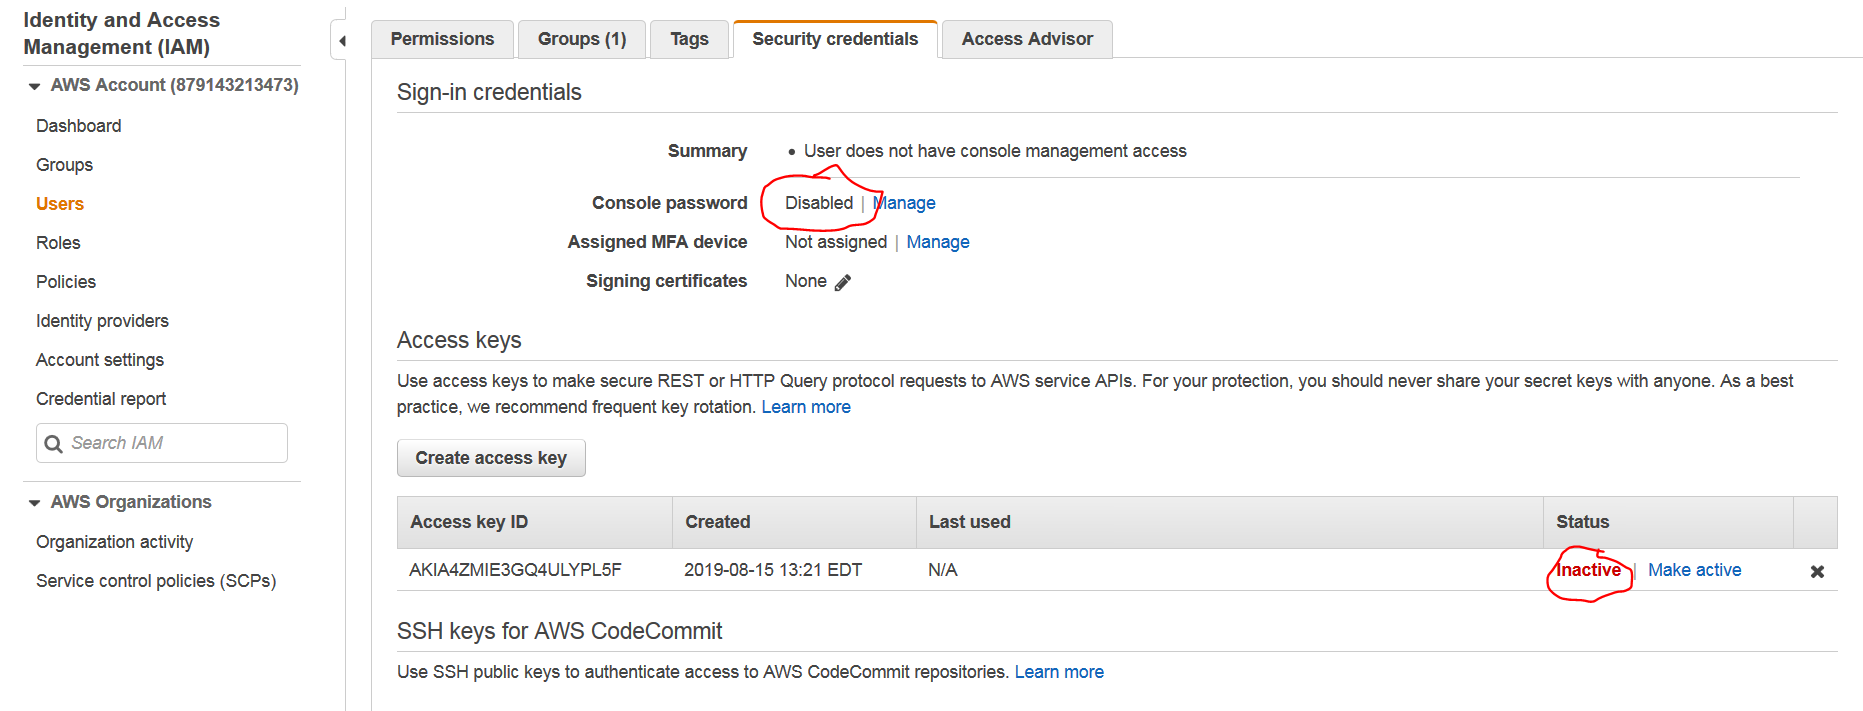
Since I shared password/access key here, I have disabled test_user and made access key inactive as shown below. You may disable/enable or recreate credentials of users in Security Credentials tab of user.
Once user is created, you can share User Sign In link for your AWS account with your users and then they can use this link to login using credentials you generated earlier.